Wool Anorak
The Wool Anorak
I've wanted a wool anorak for many years—ever since I saw some random ad from a Chinese online store featuring an anorak made of “wool.” I later found out it was a knock-off of the Boreal Mountain Anorak.
Around the same time, I stumbled across eight wool blankets from the Civil Defense at a thrift store—just 50 kroner each. I bought them all.
For the past 3–4 years, I’ve been thinking about how to design the anorak—without any prior experience making sewing patterns or anything like that.
This is how the experiment went: sacrifice one blanket and try to sew an anorak.
I used a cheap sewing machine from Aldi (300 kroner), some fairly heavy-duty needles, and strong thread. I also used a bit of paracord, some scrap leather, and edge binding.
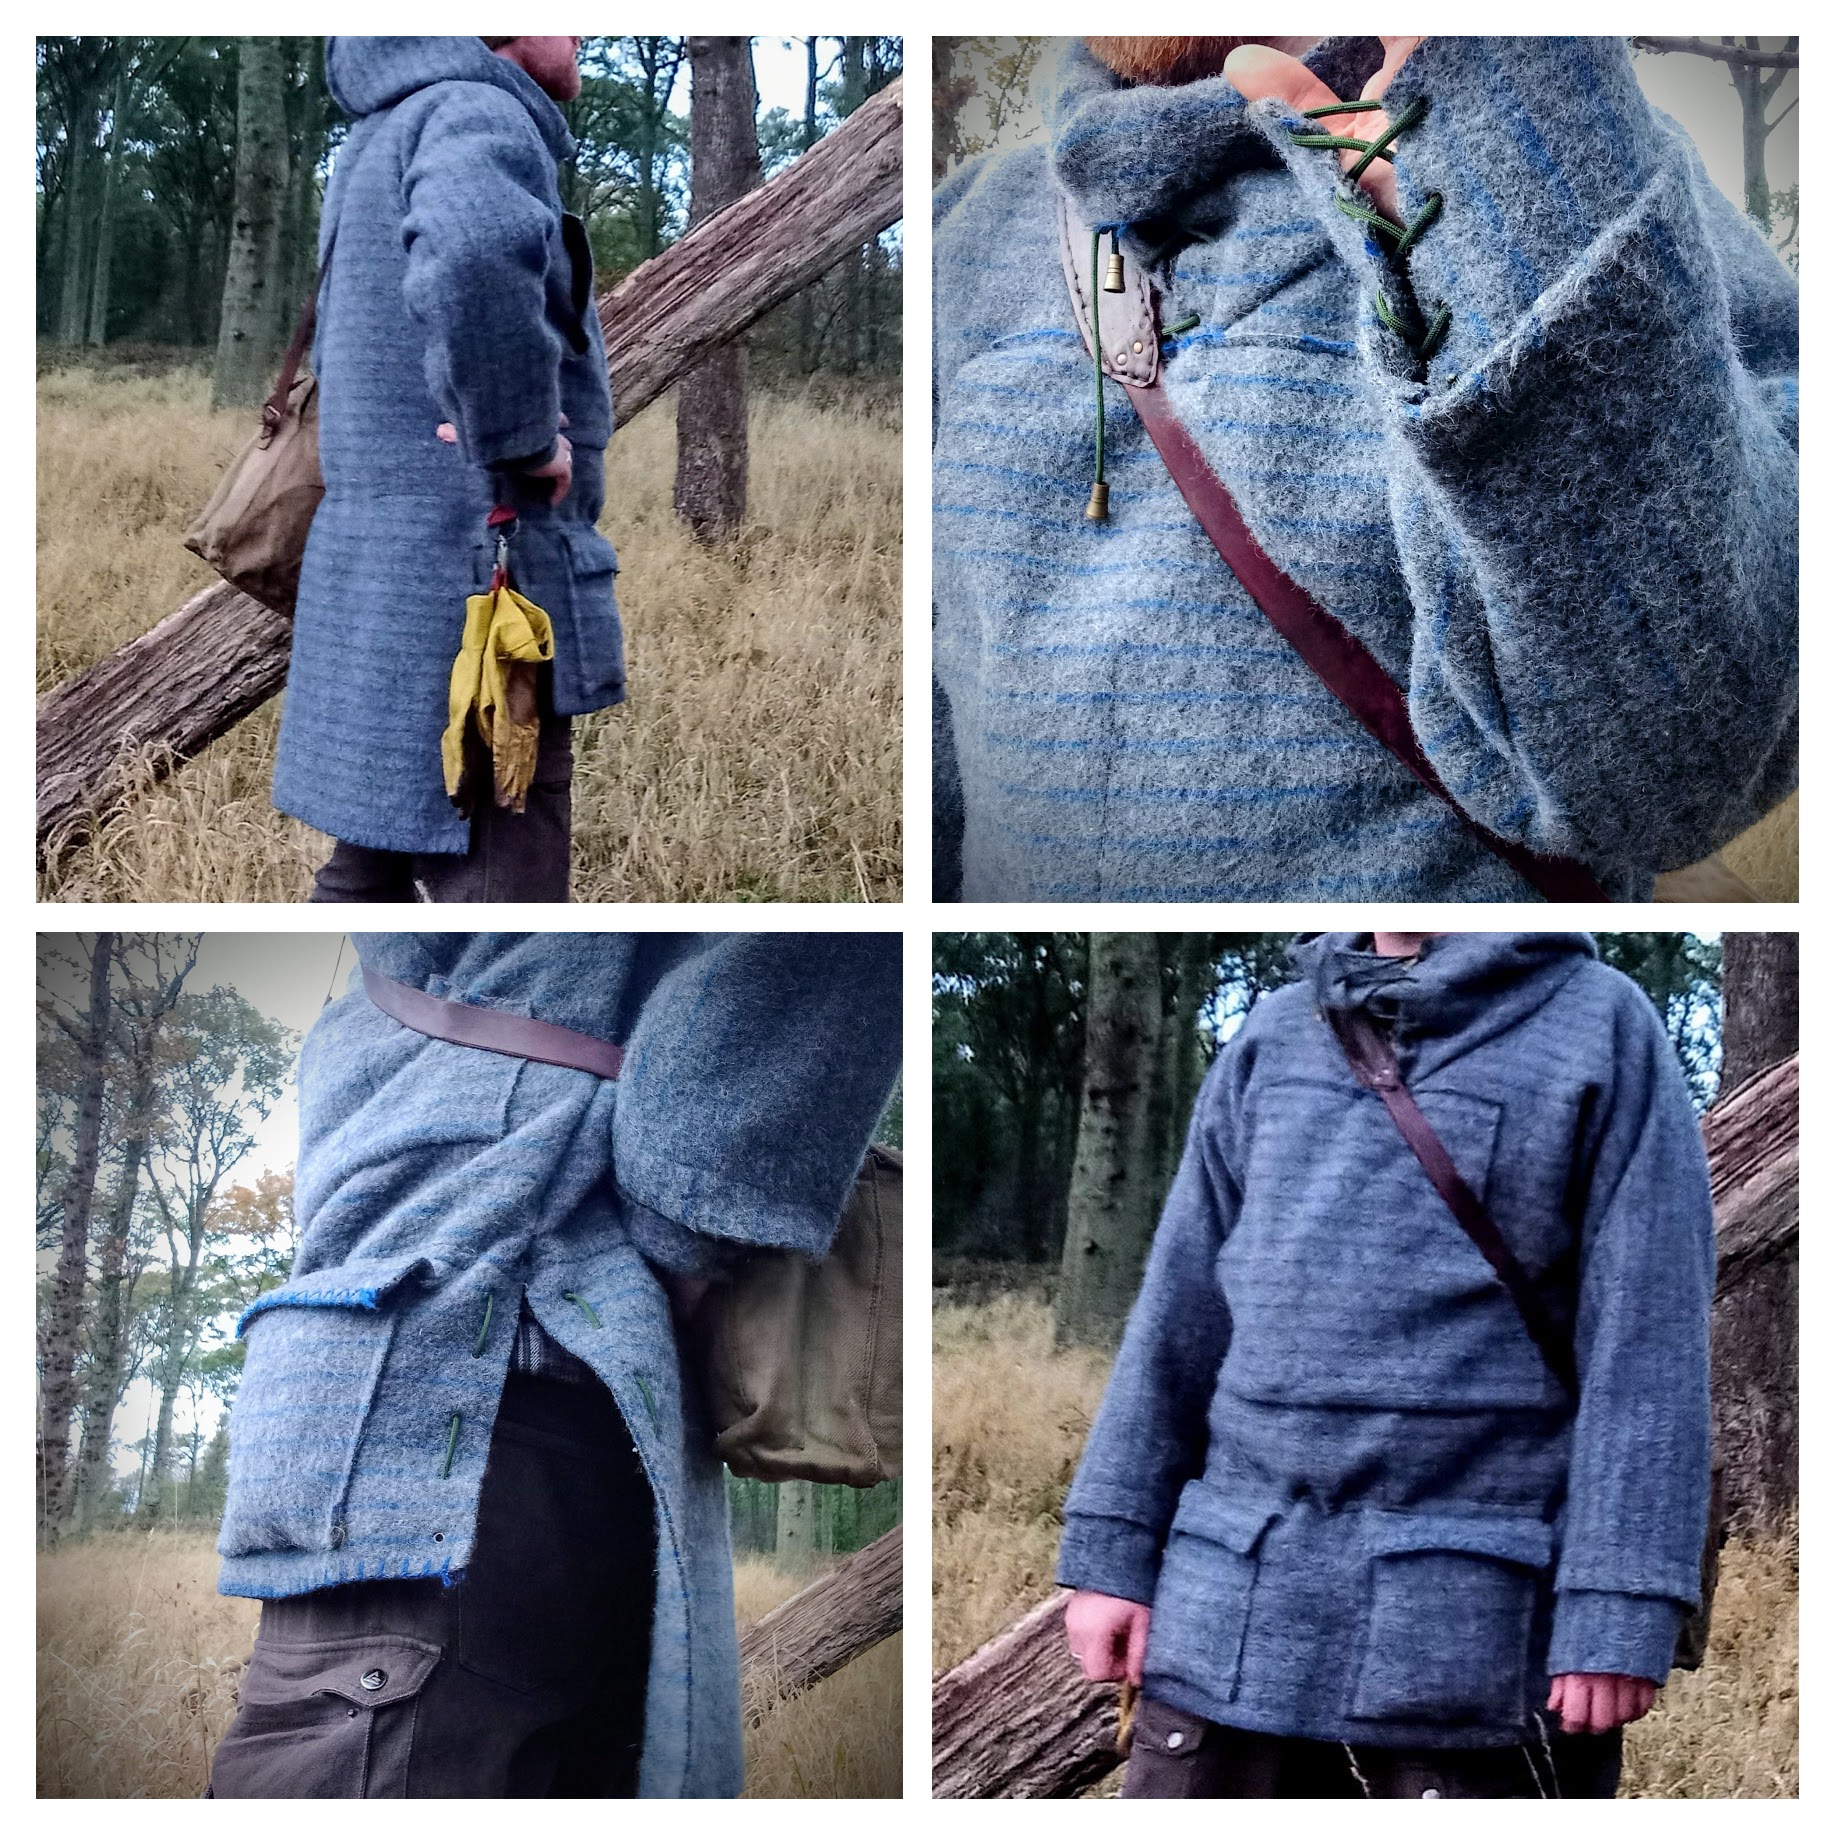
Step 1 – The Anorak
Fold the blanket in half. I made the back of the anorak a bit longer than the front. Lay down on top of the fabric and check that the sleeves will be long enough.
The body of the anorak is made from one single piece—sleeves, torso, and shoulders are all cut as one.
The pieces are sewn together down to about waist level, where your legs bend, for maximum freedom of movement.
The large leftover cutoffs are saved for detailing later.


Step 2 – The Hood
I found a large hoodie at a thrift store and cut off the hood. I took it apart at the seams and used it as a pattern.
It was easy to sew a hood from the blanket and attach it to the anorak. I also cut a slit down the front of the chest. A triangular scrap piece is sewn underneath to keep it closed properly.
With eyelets and a drawstring, you can tighten the hood opening when it’s really cold.

Step 3 – The Chest Pocket
The chest pocket is made from one of the large leftover pieces from step 1. I made sure to give it a proper bottom so that items don’t fall out—it has a bit of a “wall” on the side.
I added the pocket after sewing the anorak together in step 1—next time I’ll do it beforehand to make things easier.
While working, I got the idea to sew rabbit fur on the inside of the pocket and quickly stitched it to create two smaller compartments.
The rabbit fur is super nice on cold fingers. These two small pockets now hold my phone and a knife or multitool. I also stitched in a leather loop with a D-ring, which holds my keys in place with a carabiner.


Step 4 – Waist Drawstring
Another idea that came during the build: I sewed a strip of edge binding all the way around the waist and ran a length of paracord through it.
Most of the time, I don’t cinch it tight, but when it’s really cold, it’s nice to be able to seal out the wind.
I also added eyelets to the sides so that the anorak can be laced shut along the sides with a bit of cord—helpful in winter to close it an extra 15 cm on each side.

Step 5 – Cuffs
The sleeves felt a little too open. So I used some small leftover pieces, cut them into trapezoid shapes, and sewed them in as adjustable cuffs.
They tighten with a drawstring, which adds a bit of length and helps seal around the wrists—while keeping the sleeves comfortably wide.


Step 6 – Small Pockets
The anorak was basically done, but I still had some fabric scraps left. So I made a couple of small front pockets.
They sit just below the belt line. My work belt fits above the small pockets but below the chest pocket.
These little pockets turned out perfect for holding gloves and wrist warmers.
There’s also a ring sewn into the side of the anorak—great for clipping on my heavy leather gloves. Thin liner gloves fit perfectly in the small pockets.

Tips and Improvements for Next Time
I learned a lot about the importance of doing things in the right order.
Attaching pockets at the right stage makes everything easier—less anorak getting in the way.
Next time, I’ll zigzag stitch the edges of the fabric. The blanket is almost like felt and doesn’t really fray, but there are still small threads that come loose.
I’m still considering adding a drawstring to the hood—but honestly, I always wear a wool hat under it anyway.


Comments
Post a Comment